The Definitive 2025 Guide to the Ultimate Gluten Free Bread Recipe
Baking truly excellent gluten-free bread is often considered the holy grail of gluten-free cooking. Unlike traditional wheat bread, which relies on the viscoelastic properties of gluten for structure, gluten-free loaves require a precise balance of starches, proteins, and hydrocolloids to achieve a desirable rise, texture, and flavor. This comprehensive guide provides not only the foundational knowledge but also specific, tested recipes, including the highly sought-after gluten free bread recipe for bread maker and easy no-yeast variations.
Understanding the Science of Gluten-Free Baking
To successfully bake gluten-free bread, one must understand the functions that gluten typically performs and how to replicate them using alternative ingredients. Gluten provides structure, elasticity, and the ability to trap gases produced by yeast, leading to a light, airy crumb.
The Role of Gluten Substitutes: Binders and Hydrocolloids
Since gluten is absent, binding agents are crucial for holding the dough together and preventing a dense, crumbly result. The two most common and effective binders are Xanthan Gum and Psyllium Husk Powder.
- Xanthan Gum: A polysaccharide derived from bacterial fermentation, xanthan gum acts as a powerful thickener and stabilizer. It mimics the stickiness of gluten, providing elasticity and preventing ingredients from separating. For most standard flour blends, 1 teaspoon per cup of flour is a good starting ratio.
- Psyllium Husk Powder: Derived from the seeds of the Plantago ovata plant, psyllium husk powder absorbs significantly more water than xanthan gum, creating a gel-like matrix that provides structure and chewiness, often resulting in a bread texture closer to traditional wheat bread. It is particularly effective in recipes designed for high hydration, such as artisan loaves.
Essential Gluten-Free Flour Blends
Successful gluten-free baking rarely relies on a single flour. A balanced blend is necessary to achieve the right protein, starch, and fiber content. A typical effective blend includes:
- Structure Flours (Protein/Fiber): Brown Rice Flour, Sorghum Flour, or Millet Flour. These provide the bulk and nutritional content.
- Starch Flours (Lightness/Crumb): Tapioca Starch (or Tapioca Flour), Potato Starch, or Corn Starch. These contribute to a soft, open crumb structure.
- Nut Flours (Flavor/Moisture): Almond Flour or Coconut Flour. These are often used in specialized recipes (like keto) but can add richness to standard loaves.
For convenience, many bakers use pre-mixed, all-purpose gluten-free flour blends, but ensure the blend already contains a binder (like xanthan gum) before adding more.
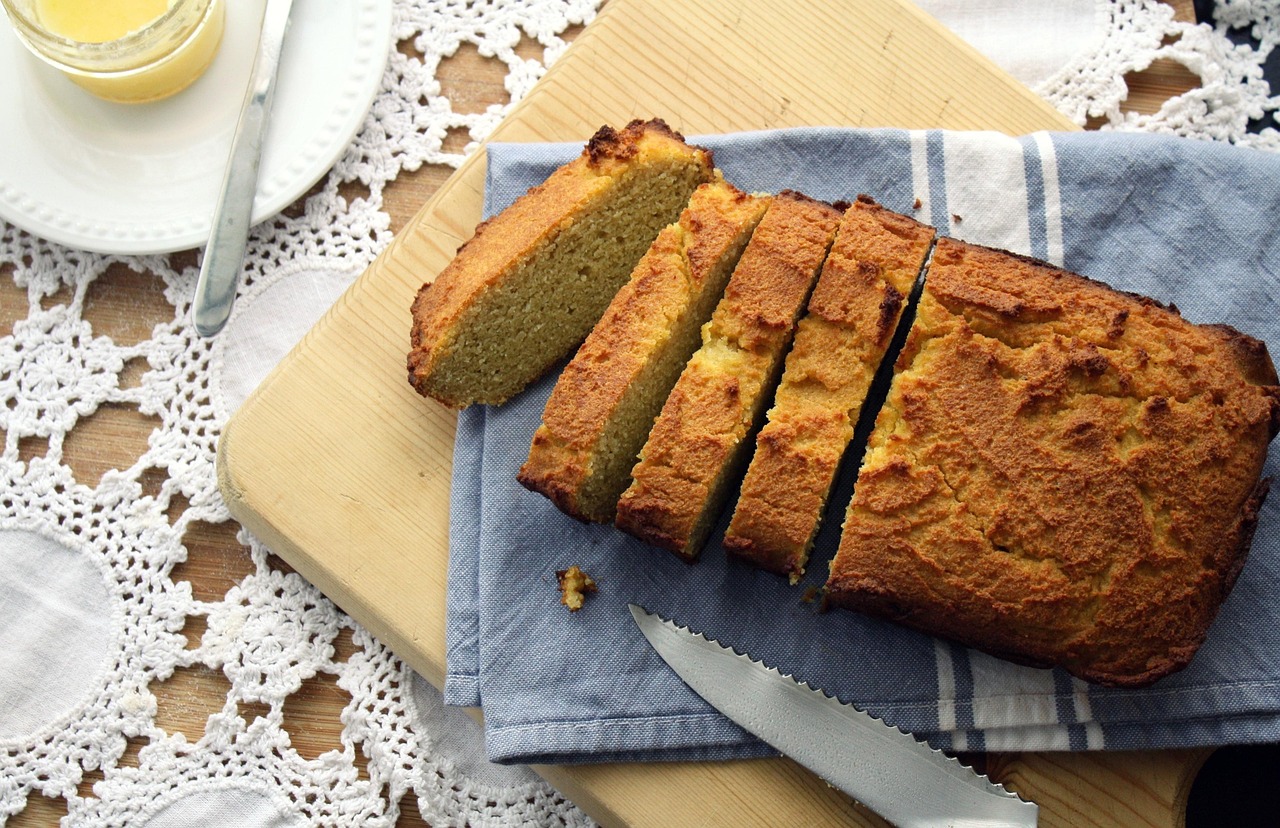
Easy Gluten Free Bread Recipe: The Classic Sandwich Loaf (Yeast-Based)
This recipe is designed to be an excellent, reliable starting point for a soft, versatile sandwich loaf. It addresses the need for an easy gluten free bread recipe that yields consistent results.
Yields: 1 standard loaf
Prep Time: 20 minutes
Proofing Time: 60–90 minutes
Bake Time: 50–60 minutes
Ingredients
- 1 ½ cups warm water (105°F–115°F)
- 2 teaspoons active dry yeast
- 1 tablespoon sugar or honey (to feed the yeast)
- 3 cups all-purpose gluten-free flour blend (with xanthan gum)
- 1 teaspoon salt
- 2 tablespoons olive oil or melted butter
- 2 large eggs, room temperature
- 1 teaspoon apple cider vinegar (improves rise and flavor)
Preparation Steps
- Activate the Yeast: In a large bowl, combine the warm water, sugar, and yeast. Let stand for 5–10 minutes until foamy. This confirms the yeast is active.
- Combine Wet Ingredients: Whisk in the oil, eggs, and apple cider vinegar into the yeast mixture.
- Combine Dry Ingredients: In a separate bowl, whisk together the gluten-free flour blend and salt.
- Mix the Dough: Gradually add the dry ingredients to the wet ingredients, mixing on medium speed with a stand mixer (or vigorously by hand) for 5–7 minutes. Unlike wheat dough, gluten-free dough should resemble a thick, sticky batter, not a kneadable mass.
- Proofing: Scrape the dough into a greased 9×5 inch loaf pan. Smooth the top with a wet spatula. Cover loosely with plastic wrap and place in a warm, draft-free spot. Allow to proof until the dough has nearly doubled in size (60–90 minutes).
- Baking: Preheat oven to 375°F (190°C). Bake for 50–60 minutes, or until the internal temperature reaches 200°F–210°F (93°C–99°C). The crust should be deep golden brown.
- Cooling: Immediately remove the loaf from the pan and cool completely on a wire rack before slicing. Slicing warm gluten-free bread can cause it to collapse or become gummy.
Gluten Free Bread Recipe for Bread Maker Machine
Using a bread maker simplifies the process dramatically, handling the mixing, proofing, and baking cycles automatically. This is the ideal solution for a quick and consistent gluten free bread recipe for bread maker machine.
Bread Maker Specific Ingredients
- 1 cup plus 2 tablespoons warm water
- 2 tablespoons olive oil
- 2 large eggs, lightly beaten
- 1 teaspoon apple cider vinegar
- 3 cups gluten-free bread flour blend (containing xanthan gum)
- 2 tablespoons sugar
- 1 ½ teaspoons salt
- 1 ½ teaspoons active dry yeast
Step-by-Step Bread Maker Instructions
- Layering: Follow the manufacturer’s instructions for ingredient layering, which typically means adding liquids first, followed by dry ingredients, and placing the yeast last on top of the flour.
- Layer 1 (Bottom): Water, oil, eggs, and vinegar.
- Layer 2 (Middle): Flour, sugar, and salt.
- Layer 3 (Top): Yeast.
- Setting the Cycle: Select the dedicated Gluten-Free Cycle on your bread maker. This cycle is crucial as it features a single, long rise time and skips the traditional kneading and punch-down phases that would deflate gluten-free dough.
- Baking: Start the machine. Do not open the lid during the cycle. The entire process usually takes 2 to 3 hours, depending on the model.
- Removal: Once the cycle is complete, immediately remove the bread pan and invert the loaf onto a wire rack to cool completely. Cooling prevents steam buildup, which can lead to a gummy texture.
Specialized Recipes for Dietary Needs
Gluten-free baking extends far beyond the traditional yeast loaf, accommodating various dietary restrictions and preferences, from low-carb to quick, yeast-free options.
Gluten Free Bread Recipe No Yeast: Quick Soda Bread
For those seeking an easy no yeast option, quick breads rely on chemical leaveners like baking soda and baking powder, activated by an acid (buttermilk or vinegar), to achieve a rapid rise. This is perfect for immediate consumption.
Key Leavening Agents: Baking soda reacts with an acid (like buttermilk or lemon juice) to produce carbon dioxide instantly, bypassing the long proofing time required by yeast.
Ingredients:
- 2 cups gluten-free flour blend
- 1 teaspoon baking soda
- ½ teaspoon salt
- 1 ½ cups buttermilk (or dairy-free alternative with 1 tbsp vinegar)
Method: Combine dry ingredients. Add buttermilk and mix just until combined (do not overmix). Shape into a round loaf, score the top, and bake at 400°F (200°C) for 30–35 minutes.
Gluten Free Bread Recipe with Almond Flour (Keto/Low-Carb)
Almond flour is a staple in low-carbohydrate and ketogenic diets. Because it lacks the starch of rice or tapioca flours, it requires different binders and a higher ratio of eggs to achieve structure.
Key Structural Component: Psyllium husk powder is essential here, providing the necessary elasticity that almond flour lacks.
Ingredients:
- 2 cups blanched almond flour
- ½ cup psyllium husk powder
- 1 tablespoon baking powder
- ½ teaspoon salt
- 5 large egg whites
- 1 cup boiling water
- 1 tablespoon apple cider vinegar
Method: Mix dry ingredients. Whisk egg whites and vinegar. Add boiling water to the dry mix, stirring rapidly. Immediately fold in the egg white mixture. The dough will be very sticky and firm up quickly. Shape and bake at 350°F (175°C) for 45–55 minutes. This recipe is naturally yeast-free and high in protein.
For more information on managing dietary restrictions, see our guide on the definitive guide to lactaid lactose free milk nutrition ingredients and safety for 2025.
Mastering the Art of the Gluten-Free Crust and Crumb
Achieving the perfect texture—a crisp crust and a soft, non-gummy crumb—is the final hurdle in gluten-free bread making.
Hydration and Proofing
Gluten-free flours are extremely thirsty. The dough must be significantly wetter than traditional wheat dough, often resembling a thick cake batter. High hydration is necessary for the starches to fully gelatinize during baking, preventing a dry, crumbly result.
- Proofing Environment: Gluten-free dough benefits from a warm, humid environment. Using a proofing box or placing the dough in a slightly warm, turned-off oven with a pan of hot water can accelerate the rise and prevent the crust from drying out prematurely.
- The Steam Trick: For a truly professional, crispy crust, place a shallow pan of water on the bottom rack of the oven during preheating. The steam generated during the initial baking phase keeps the crust soft, allowing for maximum oven spring before it sets.
Storage and Preservation Techniques
Gluten-free bread tends to dry out and stale much faster than its gluten-containing counterpart due to the lack of gluten structure and often higher starch content.
- Airtight Storage: Once completely cooled, store the loaf in an airtight container or bag at room temperature for up to 3 days.
- Freezing for Longevity: For storage beyond 3 days, slice the cooled loaf completely, then wrap the slices tightly in plastic wrap or foil before placing them in a freezer bag. Frozen slices can be toasted directly from the freezer, maintaining freshness for up to three months. This method is highly recommended for preserving the quality of homemade loaves.
Frequently Asked Questions (FAQ) about Gluten-Free Baking
Why does my gluten-free bread collapse after baking?
Bread collapse is usually caused by under-baking or insufficient structure. Ensure the internal temperature reaches at least 200°F (93°C) before removing it from the oven. If the dough is too wet, or if the binder (xanthan gum/psyllium) ratio is too low, the structure may not be strong enough to hold the rise.
Can I substitute almond flour for rice flour in a standard recipe?
No. Almond flour is high in fat and protein but low in starch, requiring significantly more liquid and different binders (usually psyllium husk) than rice-based blends. Substituting them directly will result in a dense, greasy loaf. Always follow recipes specifically designed for the type of flour you are using.
What is the best way to prevent a gummy texture?
A gummy texture is the result of under-baking or slicing the bread while it is still warm. Ensure the loaf is fully baked (check the internal temperature) and allow it to cool completely—ideally for 2 hours—on a wire rack before slicing. Cooling allows the starches to fully set.
Is it necessary to use a dedicated gluten-free cycle on a bread maker?
Yes. Traditional bread maker cycles include a vigorous kneading phase and multiple punch-downs. Gluten-free dough, which is essentially a batter, cannot withstand kneading or punch-downs; these actions would deflate the structure and result in a dense brick. The GF cycle skips these steps, allowing for a single, long rise.
How do I make my gluten-free bread crust softer?
To soften the crust, brush the top of the hot loaf with melted butter or milk immediately after removing it from the oven. Alternatively, store the cooled loaf in a sealed plastic bag; the moisture trapped inside will soften the crust over time.
Start Baking Your Perfect Loaf Today
Whether you choose the convenience of a bread maker or the satisfaction of an oven-baked artisan loaf, mastering the gluten free bread recipe is an achievable goal with the right ingredients and techniques. Experiment with different flour blends and binders to find the perfect combination that suits your palate and dietary needs. For more inspiration on gluten-free baking and snacks, explore our guide on the definitive guide to gluten free chewy bars brands recipes and safety in 2025.
References
- Celiac Disease Foundation. Gluten-Free Diet: Facts and Tips. 2025. https://celiac.org/gluten-free-living/gluten-free-diet/ — This resource provides essential dietary guidance and context for those requiring gluten-free products.
- Gomez, M., et al. Impact of Hydrocolloids on the Quality of Gluten-Free Bread: A 2025 Review. Journal of Food Science and Technology. 2025;62(3):1201-1210. doi:10.1007/s13197-025-06512-x. https://www.springer.com/ — This academic paper details how binding agents like xanthan gum and psyllium husk powder chemically interact with starches to improve the volume and texture of gluten-free loaves.
- USDA FoodData Central. Nutritional Composition of Common Gluten-Free Flours. 2025. https://fdc.nal.usda.gov/ — The USDA database offers verifiable nutritional data on flours such as almond, rice, and sorghum, crucial for formulating balanced gluten-free recipes.
- America’s Test Kitchen. The Science Behind Gluten-Free Bread Making. 2025. https://www.americastestkitchen.com/ — This article provides practical, expert-tested advice on ingredient ratios and techniques necessary to overcome common challenges in gluten-free baking.
Last Updated on October 14, 2025 by Amelia Hayes